1. Importing battery samples#
Note
If you have already imported your samples into the app, you may proceed with protocol creation in the next step.
A cycling experiment requires first and foremost a battery sample to cycle. This page will guide you through uploading battery sample specifications onto the app using Aurora’s sample importer feature.
First, navigate to the Samples section of the Inventory.

Expand Import samples from robot output to open the importer.
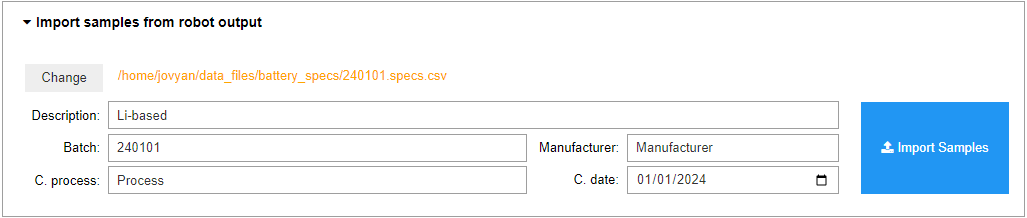
Click Select/Change to choose a battery sample specifications file (.csv format). This file may contain more than one sample (typically 36). Once a file is selected, form controls will become active allowing you to enter metadata for the sample batch.
Tip
To download a battery sample specifications template, click here.
When ready, click Import Samples to uploaded the samples. The samples will appear in the selection box below.
Important
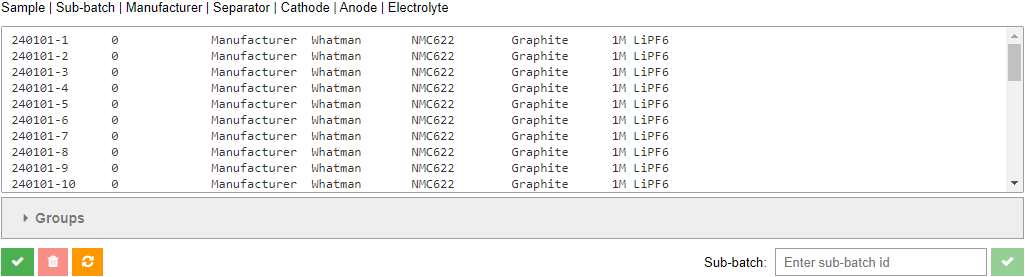
Samples are not yet saved to the local cache. To do so, click the save button (✅) at the bottom left corner of the Samples tab. Alternatively, to reset changes, click on the refresh button (🔄️).
Once the samples are saved, they are immediately available for selection in the Experiment tab. More on this in a later section.
1.1. Additional Operations#
This section covers the remaining operations that may be taken on available samples in the inventory. After each operation, remember to either save or reset your changes.
1.1.1. Grouping#
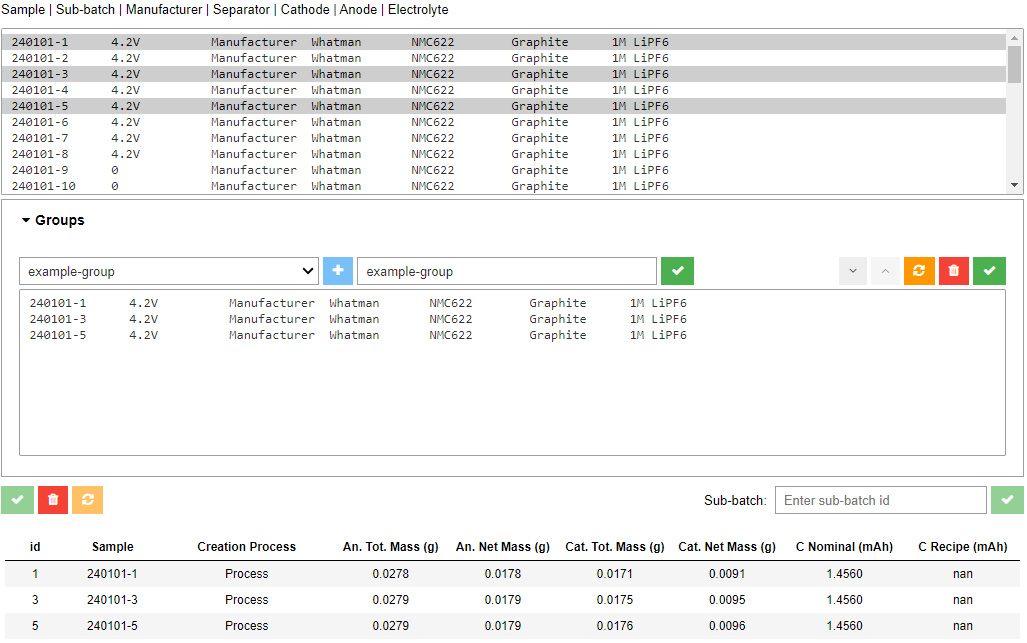
You can create custom sample groups in Aurora. These may be used to quickly narrow down sample selections when building an experiment. To do so, expand Groups, click the plus button (➕) to open the new group name dialog box, enter a name for the new group, and click the adjacent save button (✅). The new group will appear in the group dropdown menu. You may select it or any other available group.
Once a group is selected, you can select one or more samples from the samples selector above to add to the group. As you do so, a table will appear at the bottom of the section with additional information on all selected samples. Once selected, click the add samples button (🔽) to add the selected samples to the group. To remove samples from the group, select them selection box under Groups and click the remove samples button (🔼).
At any point, you may save the group by clicking the save group button (✅), or reset your changes by clicking the reset group button (🔁). You may also discard a group by clicking the delete group button (🗑️).
1.1.2. Filtering#
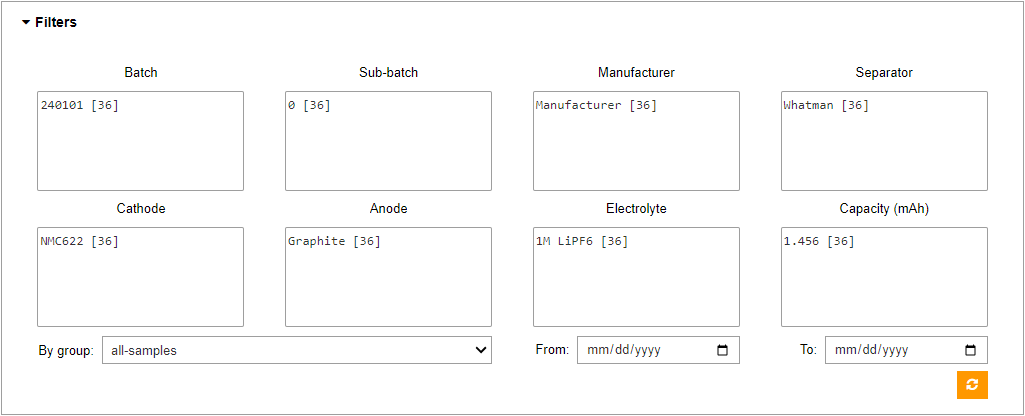
Various sample metadata may be used as filtering arguments to narrow down the sample selection options, including the custom sample groups mentioned in the previous section. Filter options are auto-populated from sample metadata. To narrow down the samples, expand Filters and select a combination of one or more values. Values will adjust reactively based on your selection. You may reset the filters at any time by clicking the reset filters button (🔁).
Tip
The number [##] next to each filter value represents the current number of available samples if the filter is selected.
1.1.3. Deleting#
Available samples may be deleted by selecting them in the available samples panel and clicking the delete samples button below (🗑️). Once deleted (and changes are saved), these samples will no longer be available for selection when preparing experiments.
Note
Be aware that deleting samples does not remove them from AiiDA if previously used in an experiment, as this will destroy experiment provenance - the relational mapping between the various components of an experiment that ensure reproducibility.
1.1.4. Sub-batching#
Lastly, it is often desired to divide a batch of samples into sub-batches. Controls for this task are available at the bottom right corner of the Samples tab. Select the desired samples, enter a sub-batch identifier in the textbox, and click the adjacent approve button (✅). The samples selection panel will reflect your changes.
